|
ADVProgressBar for iOS
iPhone widget
|
|
ADVProgressBar for iOS
iPhone widget
|
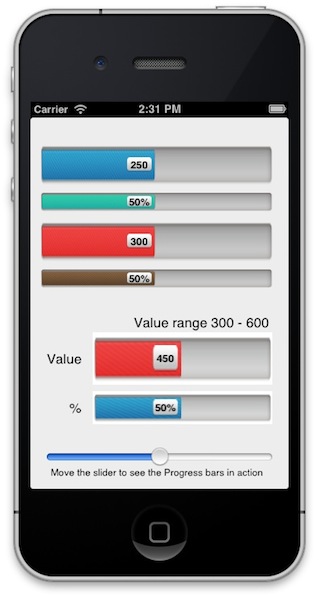
Define the ADVPercentProgressBar class, that is a Custom UIView to depict the progress of a task over time. The amount of progress is displayed by a multiple colors horizontal bar that represents a range of values.
The current progress is shown by the position of a cursor with the textual indication of the amount of the task that has completed. The amount can be displayed as integral value or a percentage of it.
The ADVPercentProgressBar class can be created and instantiated both in-code (programmatically) or via a nib (storyboard).
It is also deployed a demo app to show how to use this class in various scenarios. The source code can be found in the ADVViewController.h and ADVViewController.m files.
The custom UIView class and the demo app have been developed as an Xcode 4.5.2 project for iPhone devices targeting iOS 5.0.
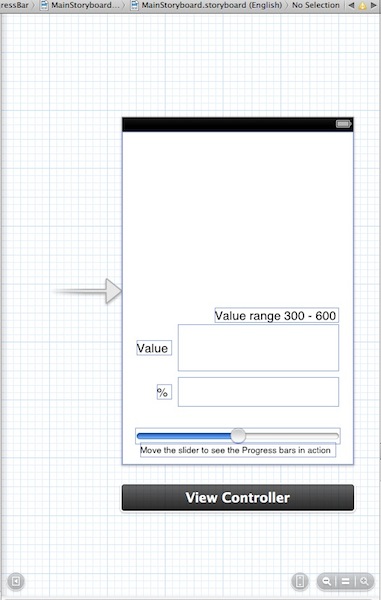
ADVPercentProgressBar Custom UIViewThe demo app looks like this:
To achieve the same yourself, open Xcode and create a new project with the iOS\Application\Single View Application template and name it ADVProgressBar. Enter ADV as Class Prefix; make sure the Device Family is set to iPhone, Use Storyboard and Use Automatic Reference Counting are checked.
Add ADVPercentProgressBar.h and ADVPercentProgressBar.m to your project.
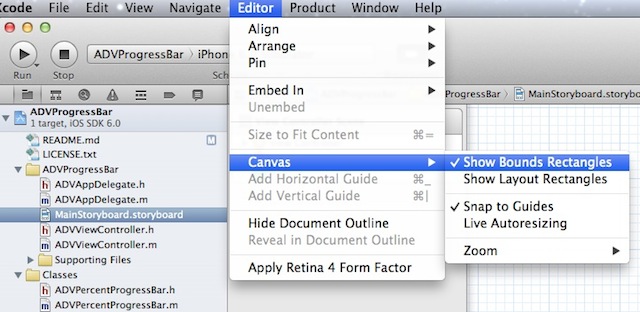
Open MainStoryboard.storyboard and go to Editor\Canvas\Show Bounds Rectangles (this will make it easier to see what we’re doing).
Drag a UIView from the Object Library into the view controller.
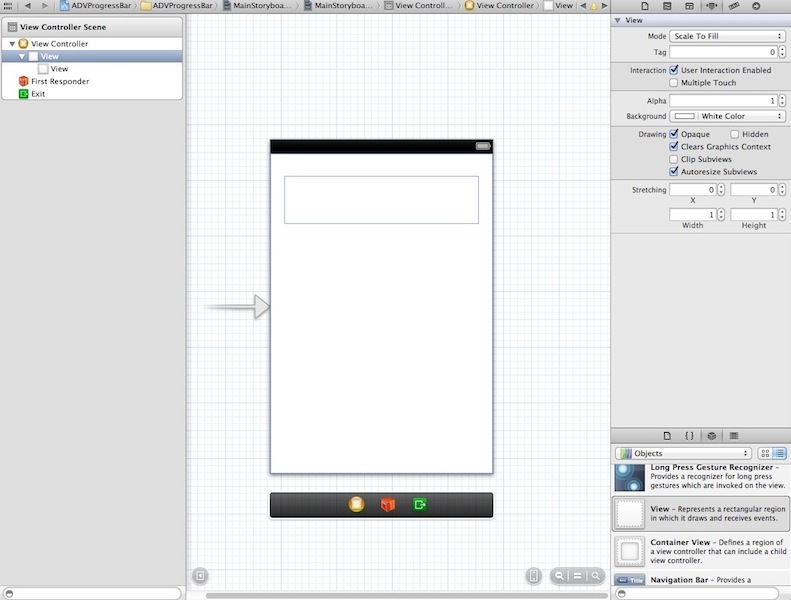
Then click on the UIView you added and go to the Identity Inspector. Set the class to ADVPercentProgressBar:

You won't be able to see what the ADVPercentProgressBar custom subview actually looks like in the storyboard canvas, you'll see just its bounds.
Now connect the custom subview to outlets.
Bring up the Assistant editor and make sure that the view controller’s header file ADVViewController.h is displayed.
Add an #import directive to include the ADVPercentProgressBar.h header.
On the canvas, Control-drag from the ADVPercentProgressBar UIView to the method declaration area in ADVPercentProgressBar.h (that is, between the @interface statement and the @end statement).
Connect it to an Outlet and named it pbRangeValue.
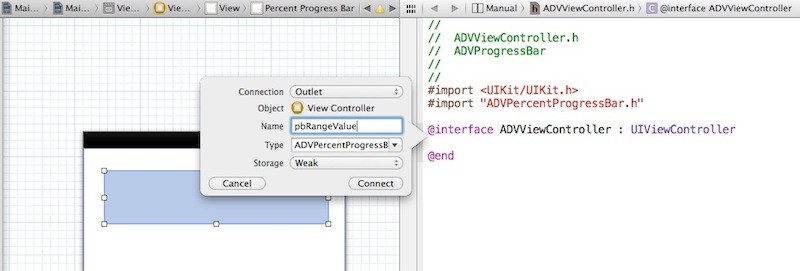
At this point ADVViewController.h should look like the following:
Repeat this for an other ADVPercentProgressBar UIView, but connect it to an outlet called pbRangePercent.
Finally, drag a Slider from the Object Library into the view controller.
This Slider will be used to animate our progress bars, then we have to configure an action connection for it.
Control-drag from the Slider in the view to the method declaration area in the header file.
In the Connection pop-up menu, choose Action.
In the Name field, enter sliderValueChanged:.
Make sure that the Type field contains UISlider.
Make sure that the Event pop-up menu contains Value Changed. You specify the Value Changed event because you want the message to be sent when the user slides the thumb along the track.
Make sure that the Arguments pop-up menu contains Sender.
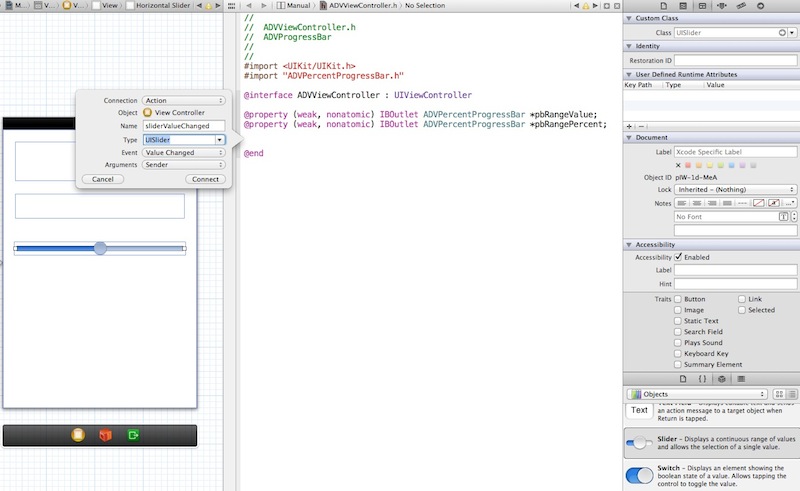
At the end, ADVViewController.h should look like the following:
Now, resize the views, add four Labels and move them around to look like the following:
Select ADVViewController.m in the project navigator and find the viewDidLoad stub implementation that Xcode added for you.
Before the [super viewDidLoad]; statement, create and instantiate programmatically a bunch of ADVPercentProgressBar custom views.
As you can see in the provided ADVViewController.m file, this follows the pattern:
After the [super viewDidLoad]; statement, set the properties of the ADVPercentProgressBar views loaded from storyboard. In this case they are not required the origin point and the size of the views because they have been implicitly set when drown.
Finally, complete the stub implementation of the sliderValueChanged: method to animate the progress bars when the user slides the thumb along the track. I have used the percentProgressBars and integralProgressBars arrays to keep track of the ADVPercentProgressBar views.
 1.8.2
1.8.2

